|
Creating a Blind Get FTP Server This article is a second in the series of how to setup a ‘blind’ FTP server. The first article covers how to setup a ‘blind drop’ server. Here is the link to the article. This article covers how-to setup an anonymous “blind get” FTP server using Microsoft Windows 2003 built-in FTP server. The concepts and NTFS permissions covered in the article are based on the KB article 314932. HOW TO: Create an FTP Folder with Read Access but Not List Access. You maybe wondering, what is a “blind get” server? A “blind get” FTP server provides a method to anonymously transfer files using FTP without having permission to list files or add files on the FTP site. In other words, you can “get” files but not see what’s there or retrieve files unless the absolute path is known. There are benefits for both the end-user and FTP administrator. The end-user doesn’t have to remember a user id and password. The FTP administrator uses NTFS permissions so anonymous users can’t browse or add files. The biggest benefit for the FTP administrator is they don’t have to maintain user ids and passwords for everyone needing FTP access. This could be useful for sending a link via email to people in the field yet no one can access the file without knowing the exact path to the files. One reason for writing this article I discovered through my testing the Microsoft article doesn’t prevent people from retrieving files after they have been placed on the FTP site. There are automated tools looking for ways to dump illegal files and do a “blind get” for later retrieval. If you’re responsible for running an FTP server, I’m sure your logs are full of automated robots scanning for anonymous FTP sites. The only benefit to the knowledge article is that if you follow the instructions, it prohibits people from having list access but still can retrieve the file if they know the filename and path . The FTP protocol has been around since the Internet was introduced. It’s an easy way for people to share files back in forth without having to know a user ID and password. As the Internet has grown, FTP remains one of the most common ways to share files. However this doesn’t come without security risks. Traditional anonymous FTP sites allow anyone to drop any type of file without it being checked, this can offer free storage for all types of files including mp3’s, movies or illegal software. This type of FTP setup isn’t for everyone, but it still has its place. Some examples would be: Dealing with 100’s of individuals and/or businesses sending files and you do not need to authenticate users, “ready to print jobs” sent via FTP, technical support centers uploading logs, memory dumps, or sharing files with 3rd party vendors that are too large to send via email. One thing to remember is FTP protocol is not secure. There is no encryption of any kind unless you’re using VPN (virtual private network) or some other means to secure the connection. Nothing can be guaranteed to be 100% secure. This would also include any type of user credentials. Before proceeding with this type of setup, carefully evaluate what types of data being sent via FTP. Security is a necessary evil, you have to be creative when providing solutions that are secure as possible and still provide services for the business. One last recommendation, if you distribute files using this method, it is a good idea to encrypt the file and also place a password on the file. Using WinZIP can provide this type of security. Here is an article that describes how-to do this. http://www.winzip.com/aes_info.htm How to setup your “Blind Get” server As this point, I’m assuming a few things are in-place. The server is running is Windows 2003, web, standard or enterprise edition. You’re server has a C: drive with the Operating System and a D: drive for data. The FTP Service has been installed and configured with the root directory to D:FTPRoot. If you’re not sure if FTP is installed and need to know how to configure the FTP root directory, please refer to the Microsoft article 323384 The steps below have you create FTP root folder with one sub folders below the FTP root folder. For security reasons, I suggest these folders not to be hosted on the same drive as server OS is installed on. Create FTPRoot folder structure
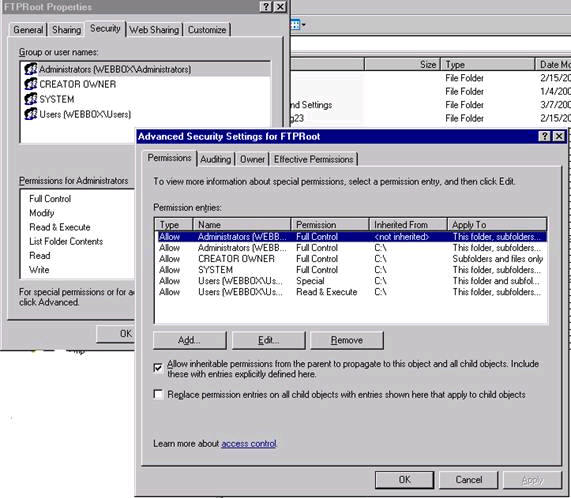
Setting up NTFS Permissions
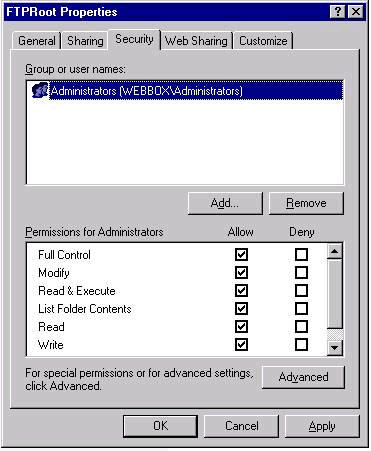
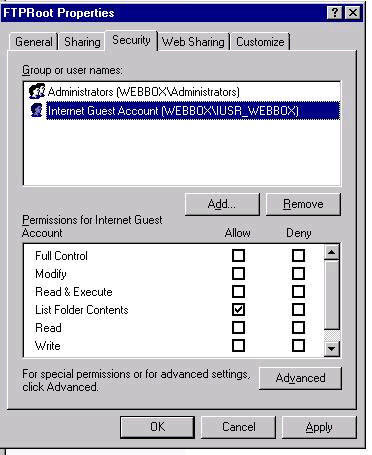
When completed the following permissions will be on the FTPRoot folder Administrators — (Full Control) Set Permissions on blindget directory
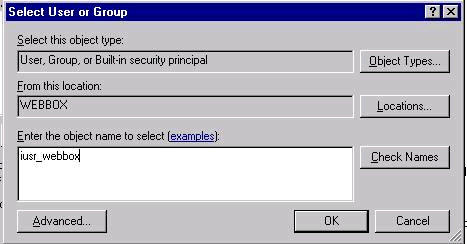
Note: The Internet guest has Read and Execute listed on anonymous user. We’ll be removing these permissions in the following steps below while the Internet Guest Account is highlighted.
Setting up FILES/FOLDER ONLY Permissions
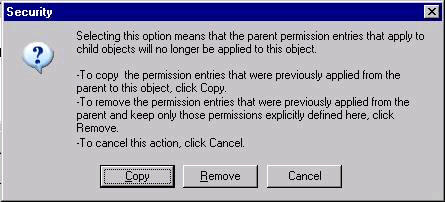
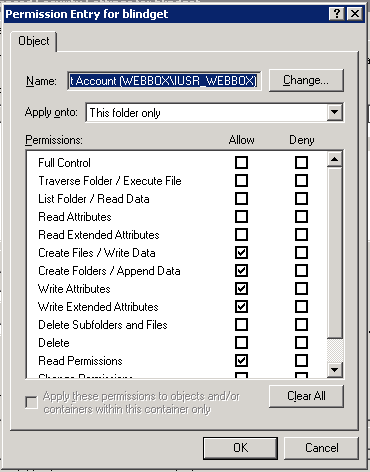
Setting up ‘This Folder Only’ Permission
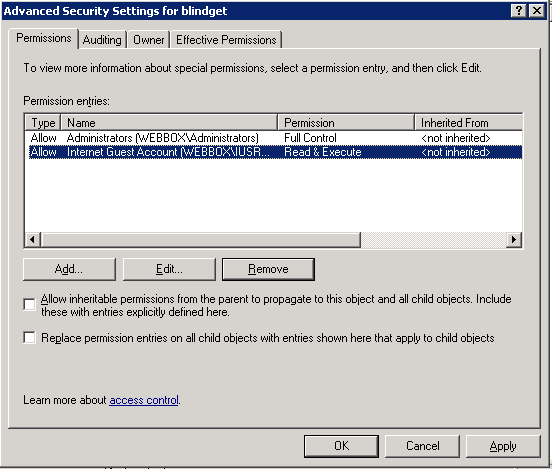
When completed the following
permissions will be on the D:FTPRootblindget
folder
Internet Guest Account (Files Only)
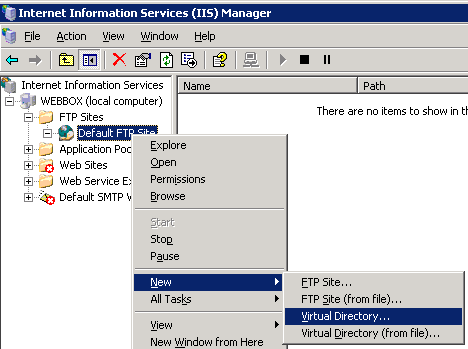
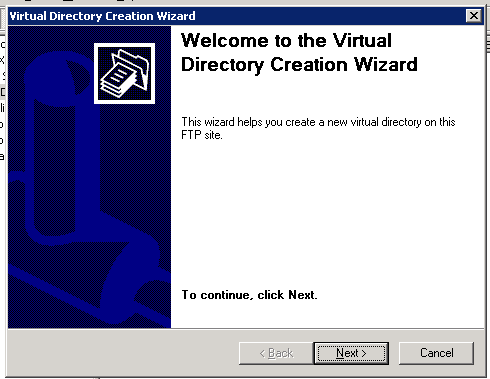
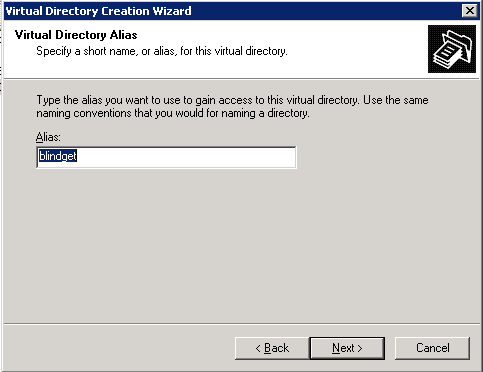
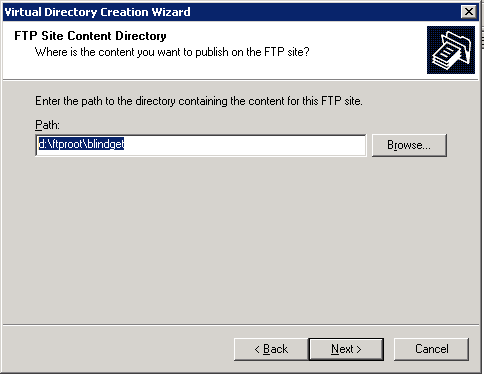
One last step, setting up virtual directory to have FTP ‘Read’ permissions You might wonder, "Why are there ‘write’ NTFS permissions on a ‘blindget’ folder?". To be able to access files, from our testing these permissions are required without granting the ‘list folder contents’ permission. The one thing we had to test around a bit to make a "true" blindget folder is use the FTP ‘Read’ option on this virtual directory. This allows to have ‘write’ NTFS permissions but the FTP ‘write’ option is turned off to prevent files from being uploaded. This protects the administrator to only have what files they want in this folder be accessed via an absolute link sent in email or another application. Here are the steps to setup the virtual directory
In conclusion, this setup allows for an anonymous FTP user to retrieve files using a command line FTP client if the absolute path is known or files can be accessed via an Internet browser. The benefit this setup prevents automated robots from writing new files or retrieving files because there are no ‘list’ permissions on the folder. This isn’t a perfect solution, but can greatly reduce user administration and provided a secure as possible, anonymous FTP server. Any questions or feedback please let me know at [email protected]. This article is copy written and can’t be printed or republished without expression content. If you would like to republish, please contact me. |